Zoneminder Tips And Tricks
Capture Sound
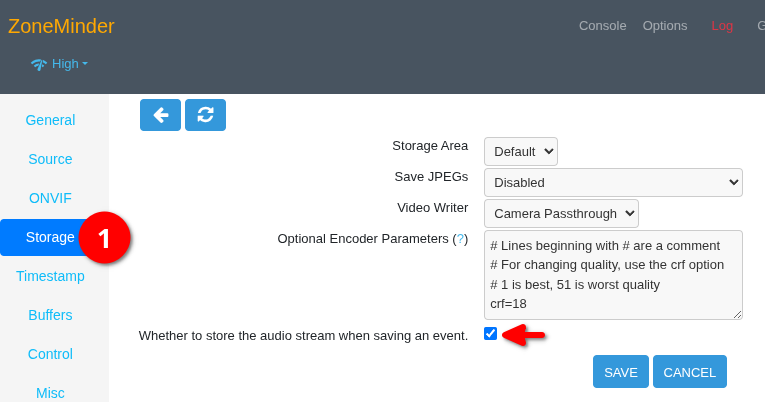
The sound stream is not saved by default, and you may wish to enable it. If so, check the checkbox at the bottom of the Storage page for your camera source.
Save Storage - Store Video, Not Images
By default, Zoneminder will store the images captured from the stream, and show them one-by-one when replaying the "video" in its player. Storing these raw images takes up a lot more storage than storing a video which only needs to store the changes between images.
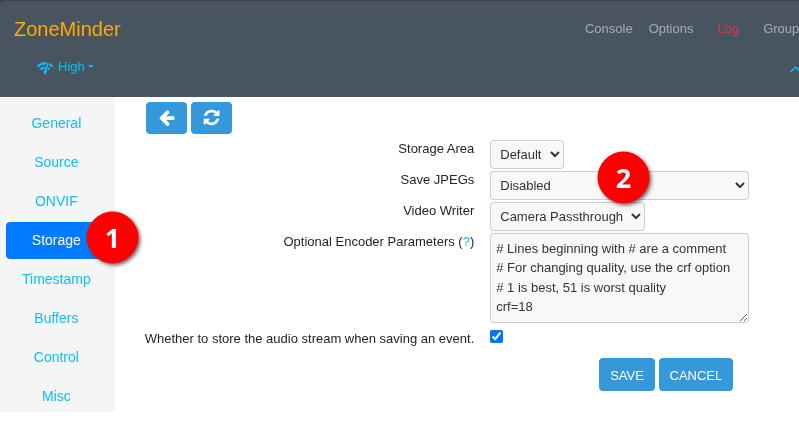
To change this setting, edit the source of the camera, navigate to storage, and then change th eoption for Save JPEGs to Disabled, and then change the Video Writer to either Camera Passhthrough or Encode. Be sure to see the note about camera passthrough to know if you should use it or not.
Save CPU - Camera Passthrough
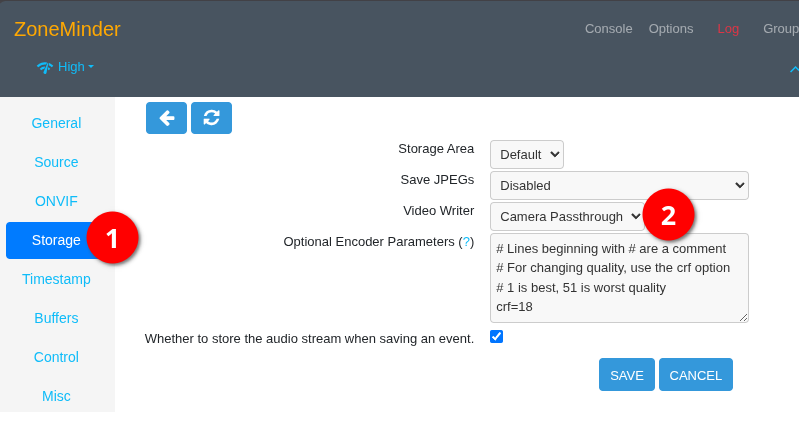
Depending on what camera/stream you have, you may even be able to set the Video Writer to Camera Passthrough to remove the need to perform the video encoding on the server. This will massively save your CPU usage, but will require the stream to be a web friendly format if you wish to be able to view the videos in Zoneminder. E.g. the more modern Reolink cameras often provide the stream in HEVC/h265 format, which cannot be played in most browsers (Edge might be able to, but definitely not chrome/firefox).
Increase Buffers To Truly Capture Event
Zoneminder has a habit of not capturing the event at the start and end of what you want. E.g. someone walking up to your house may have to have moved for a bit of time before Zoneminder kicks in and starts recording because the movement finally was enough for it to realize something was going on. Thus it is good to capture a few seconds before the alarm was triggered so that you can capture the start of the person approaching. Likewise, Zoneminder can end a bit earlier than you want, so you may wish to add a few seconds afterwards.
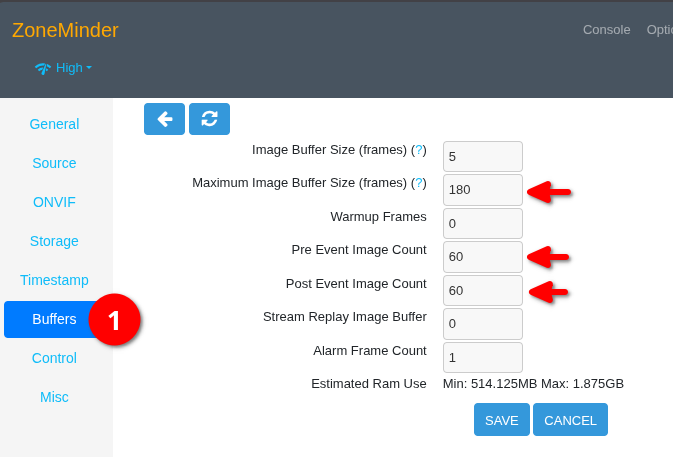
To do this, simply bump up the pre and post event image count as shown in the image below. You need to use a number that is equal to the number of frames per second, multiplied by the number of seconds you want. Finally, the Maximum Image Buffer size needs to be at least the same as those two numbers added together, but I found that I needed to add a bit more to prevent errors appearing in the console. Hence since I have 60 frames pre and post, I need at least 120 frames in the Maximuum Image buffer, and then added another 60 to it to get to 180.
First published: 28th August 2026
